Porting this website from Create-React-App to NextJS
Why NextJS you ask? Let me explain why and talk about what it took to get there.
January 23, 2022 - 20 min read
I've had a personal website for years. For me, my personal website was just an excuse for me to learn the latest front-end technologies. In 2019, I've decided to learn this React thing everyone was talking about and the easiest way to get started was Create-React-App. Yes, it was simple, but it came with limitations such as; no metatags, no static rendering, no built-in image optimisation, no Internet Explorer support, no lazy loading. I got around those limitations by implementing features on my own, but the cost of getting around those limitations started outweighing the benefits of CRA as my website kept growing.
Why did I choose NextJS? Because it already came with the workarounds that I built into CRA. Plus automatic deployments via Vercel.
I could have used Gatsby, in fact my friend & front-end wizard Sam-Larsen Disney has recommended me to use Gatsby for my use-case. I've looked into it, and realised the porting process was more complicated. I had to dive into GraphQL and manage deployments on my own. NextJS already came with static rendering, so I didn't spend much time looking into Gatsby. It seemed like I could just copy and paste my component code and sass files, and it would just work in NextJS (kind of did actually).
1) Server Side Rendering
The biggest benefit NextJS provides for my website is static site generation combined with SSR. Static generation allows my website to be indexed by search engines, and SSR allows my website to have meta previews when links are shared on social media platforms and messaging apps.
Previously in my CRA website, I achieved this using react-snap. This tool crawls through your website during build time and generates a static HTML file of the final render result. This way, search engines and meta preview generators can grab the contents of your site.
While the react-snap solution worked fine, it wasn't the cleanest solution. I had
to configure react-snap myself and the
build time of my website would increase linearly with every new blog post I've added in.
I had to rely on react-helmet
and custom code (MetaDecorator).
NextJS comes with a similar solution out of the box
and I don't have to configure react-snap. One less dependency to manage, 10 lines
less code to worry about and a more streamlined build process. Remember, the best code
is the one that you don't write.
I'd also like to add, it's not about the extra 10 lines of code. 10 lines of code is practically nothing. Technically, it's one less "WTF how did this work?" moment when you come back to this project after a break. If you've ever taken a break from a project and came back afterwards, you already know what I mean.
2) Goodbye React-Router
React-Router with CRA allows you to define which react component your site will display when the user navigates to /home or /contact or /blog pages. At first, it's fine, but when you start optimising your website for speed and implement lazy loading, it gets confusing very quickly. Plus, react router requires you to implement things like resetting the scroll position. Let's say you were on the home page, scrolled down and then clicked the blog link on the navbar. When navigating onto the blog page, react-router will retain the scroll position from the previous page so the users will start from the bottom of the blog page. If you want CRA to do this properly, you need to implement it yourself. This is a YouTube video explaining this issue. There is a chance that I might have misunderstood how react-router should be used, but I wouldn't even be confused about this if react-router wasn't there at all.
NextJS comes with something called API routes. You just create a folder structure for your website and NextJS automatically lazy loads all routes. I don't need to worry about resetting scroll position or managing routes manually anymore. NextJS takes care of it all.
3) Adding Meta tags to Blog Posts
What you're seeing in this page is a styled version of a markdown file. My blog post markdown files also contain meta information. When shared on social media, this enables me to show a thumbnail image and a description. I previously explained how this works on a YouTube video. Here is the structure I used in my CRA website:
<BlogMetaDecorator
  folder="throttlingMacBook"
  image="leftFanBottomRight.jpg"
  imageAlt="MacBook Pro 16 Left Fan with some dust"
  description="Reviews said this laptop had better thermals compared to the previous generation. Mine had great thermals too, up until today."
  title="CK - Throttling MacBook Pro 16"
/>

// The rest of the markdown file...
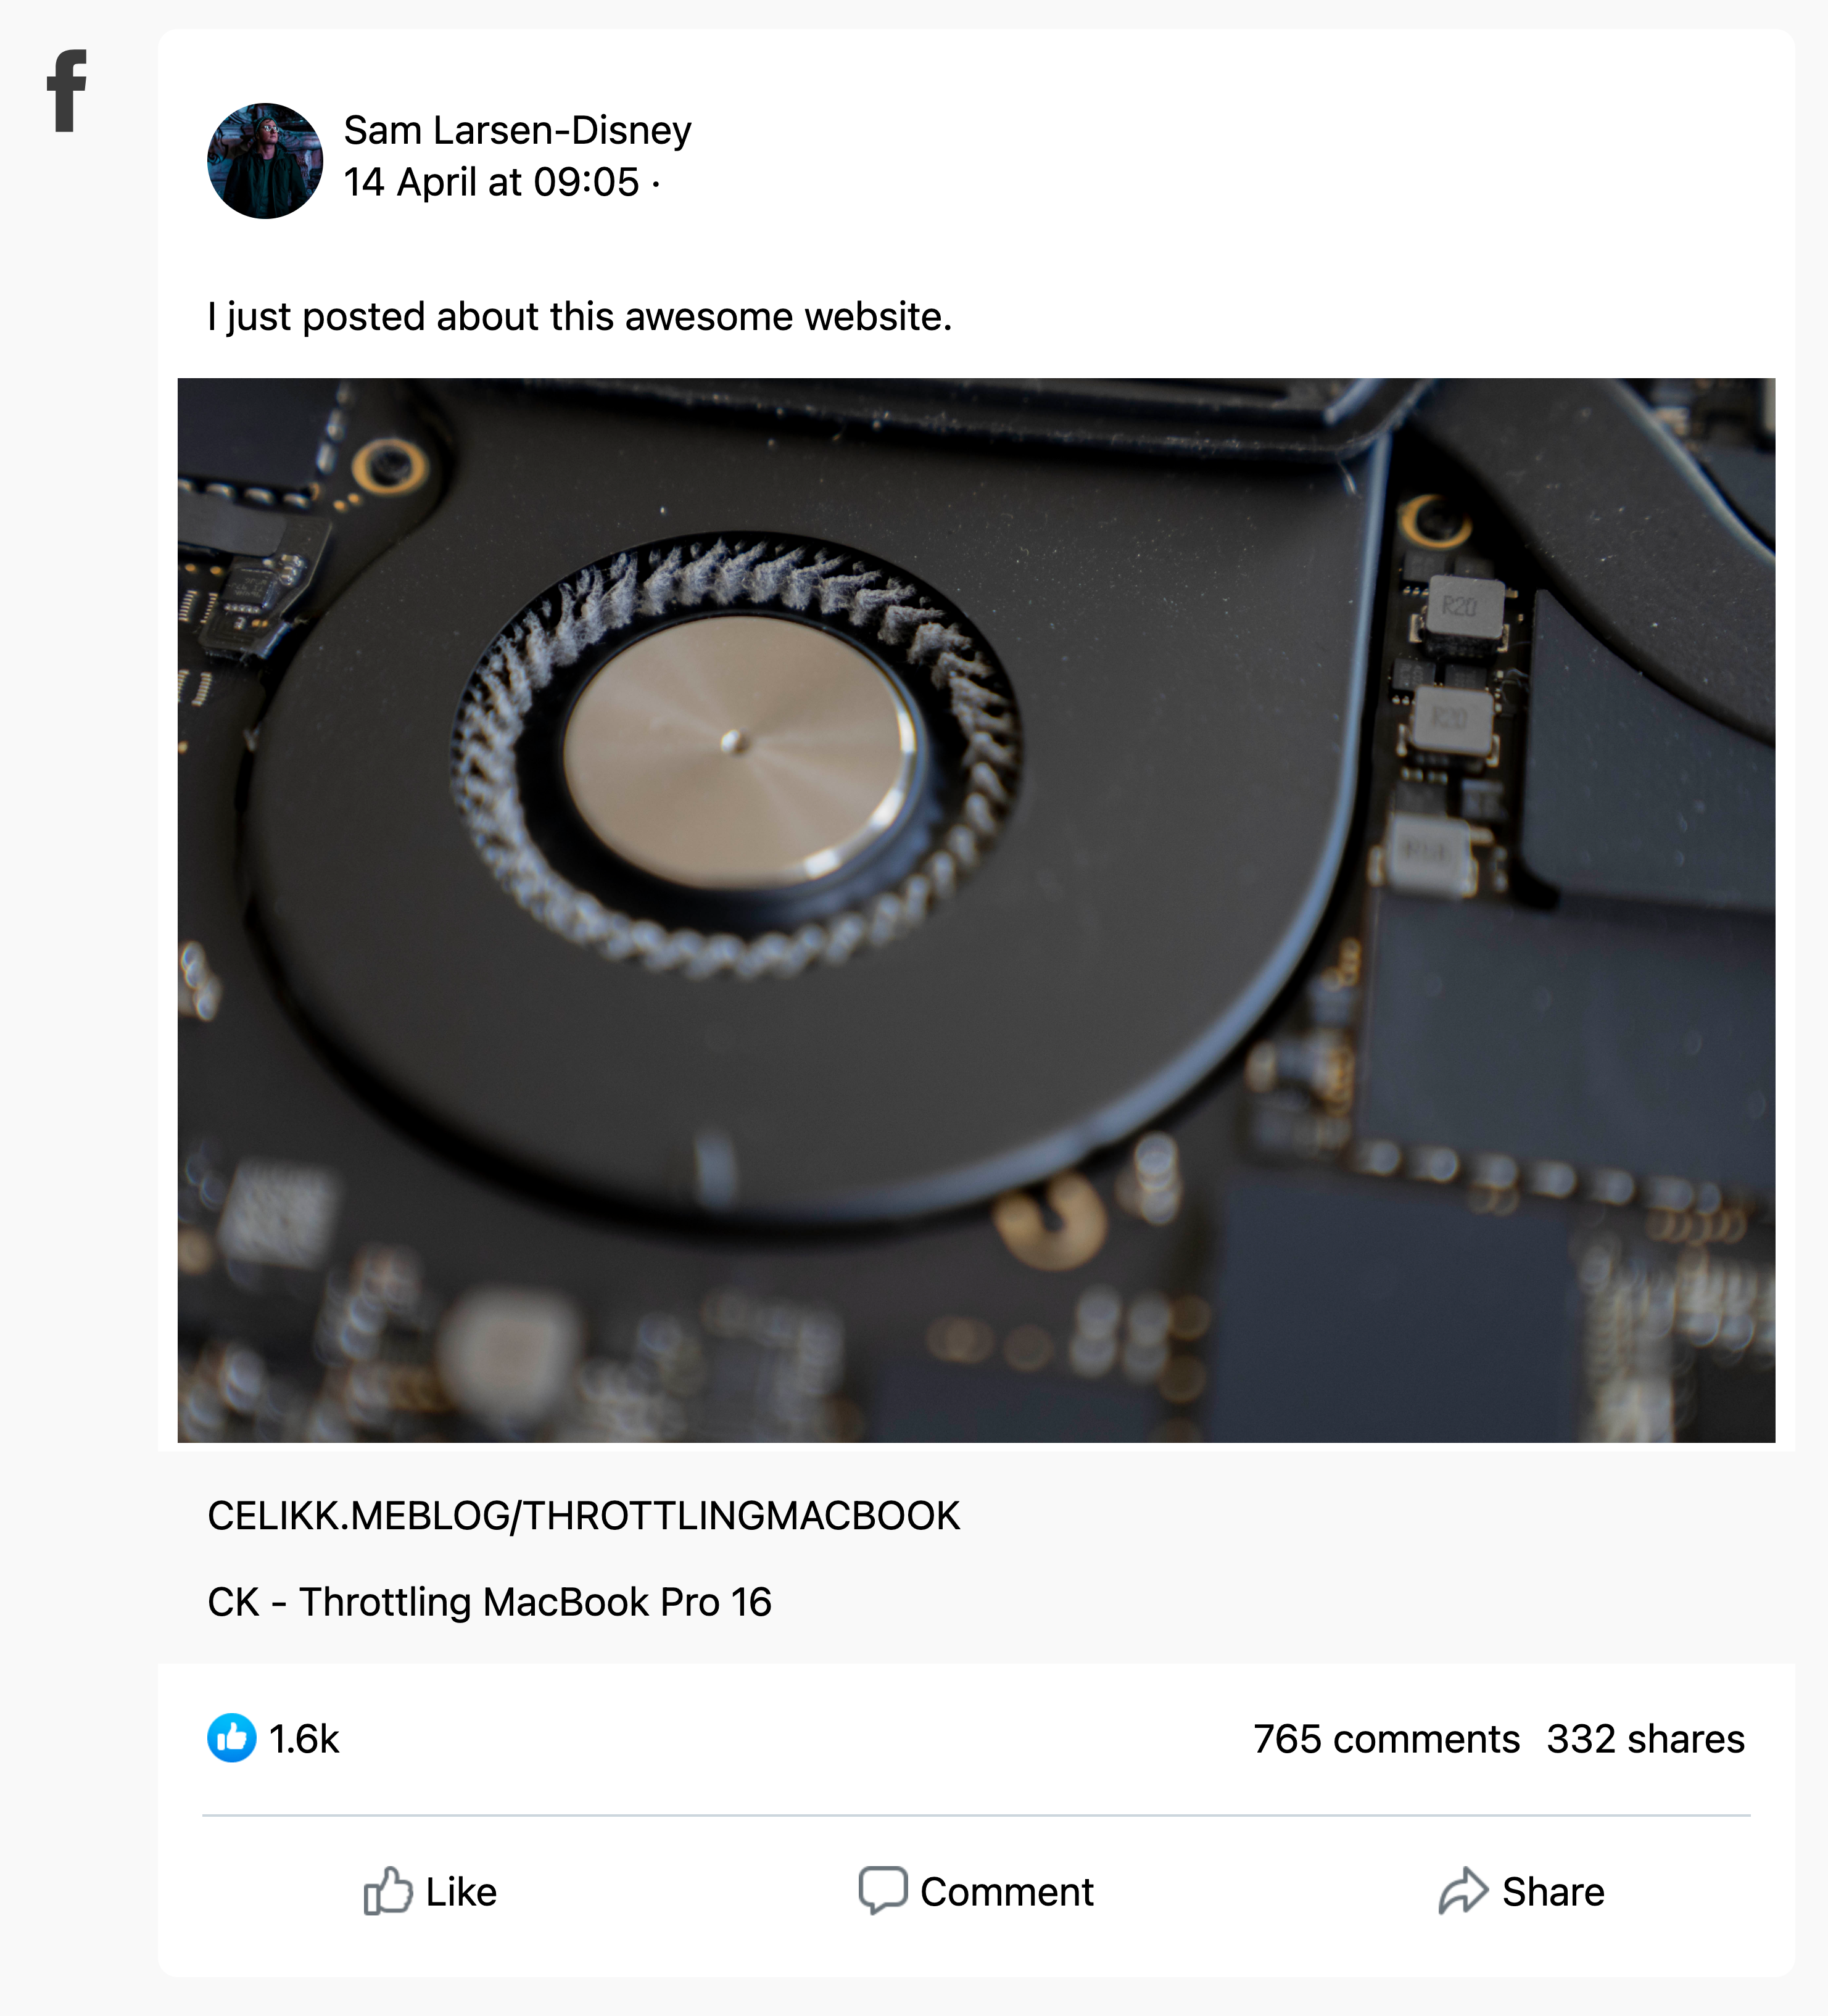
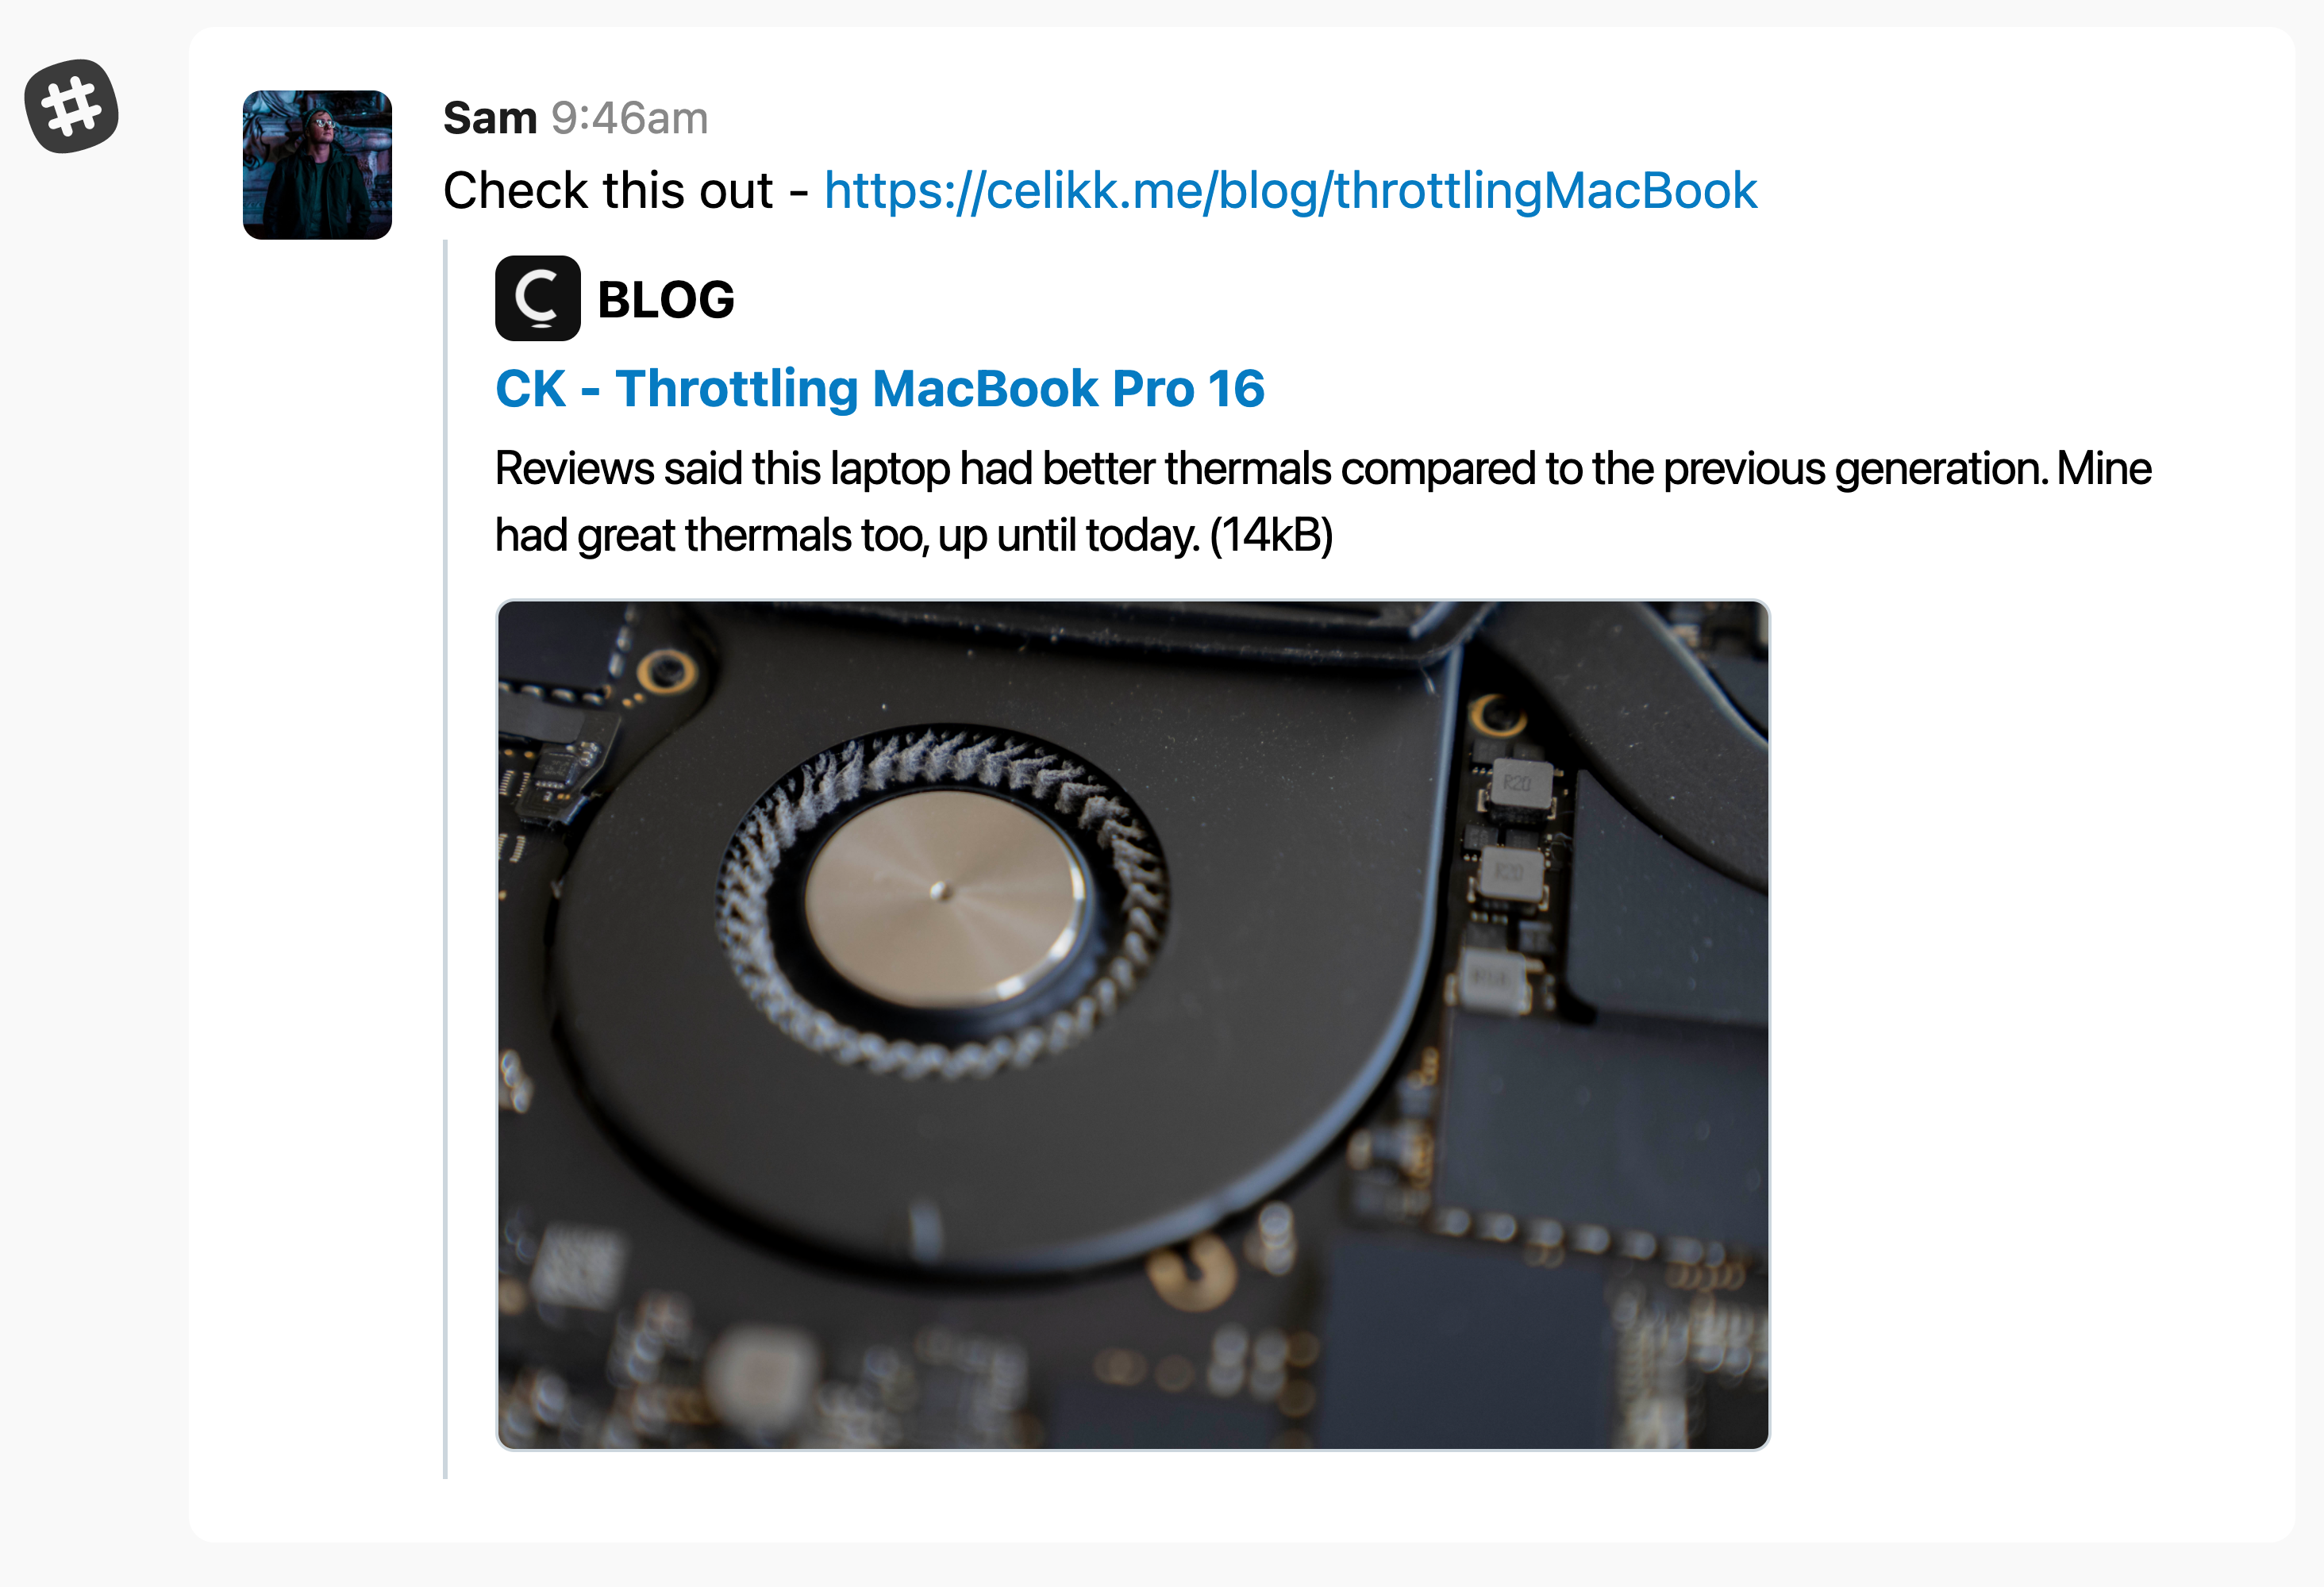
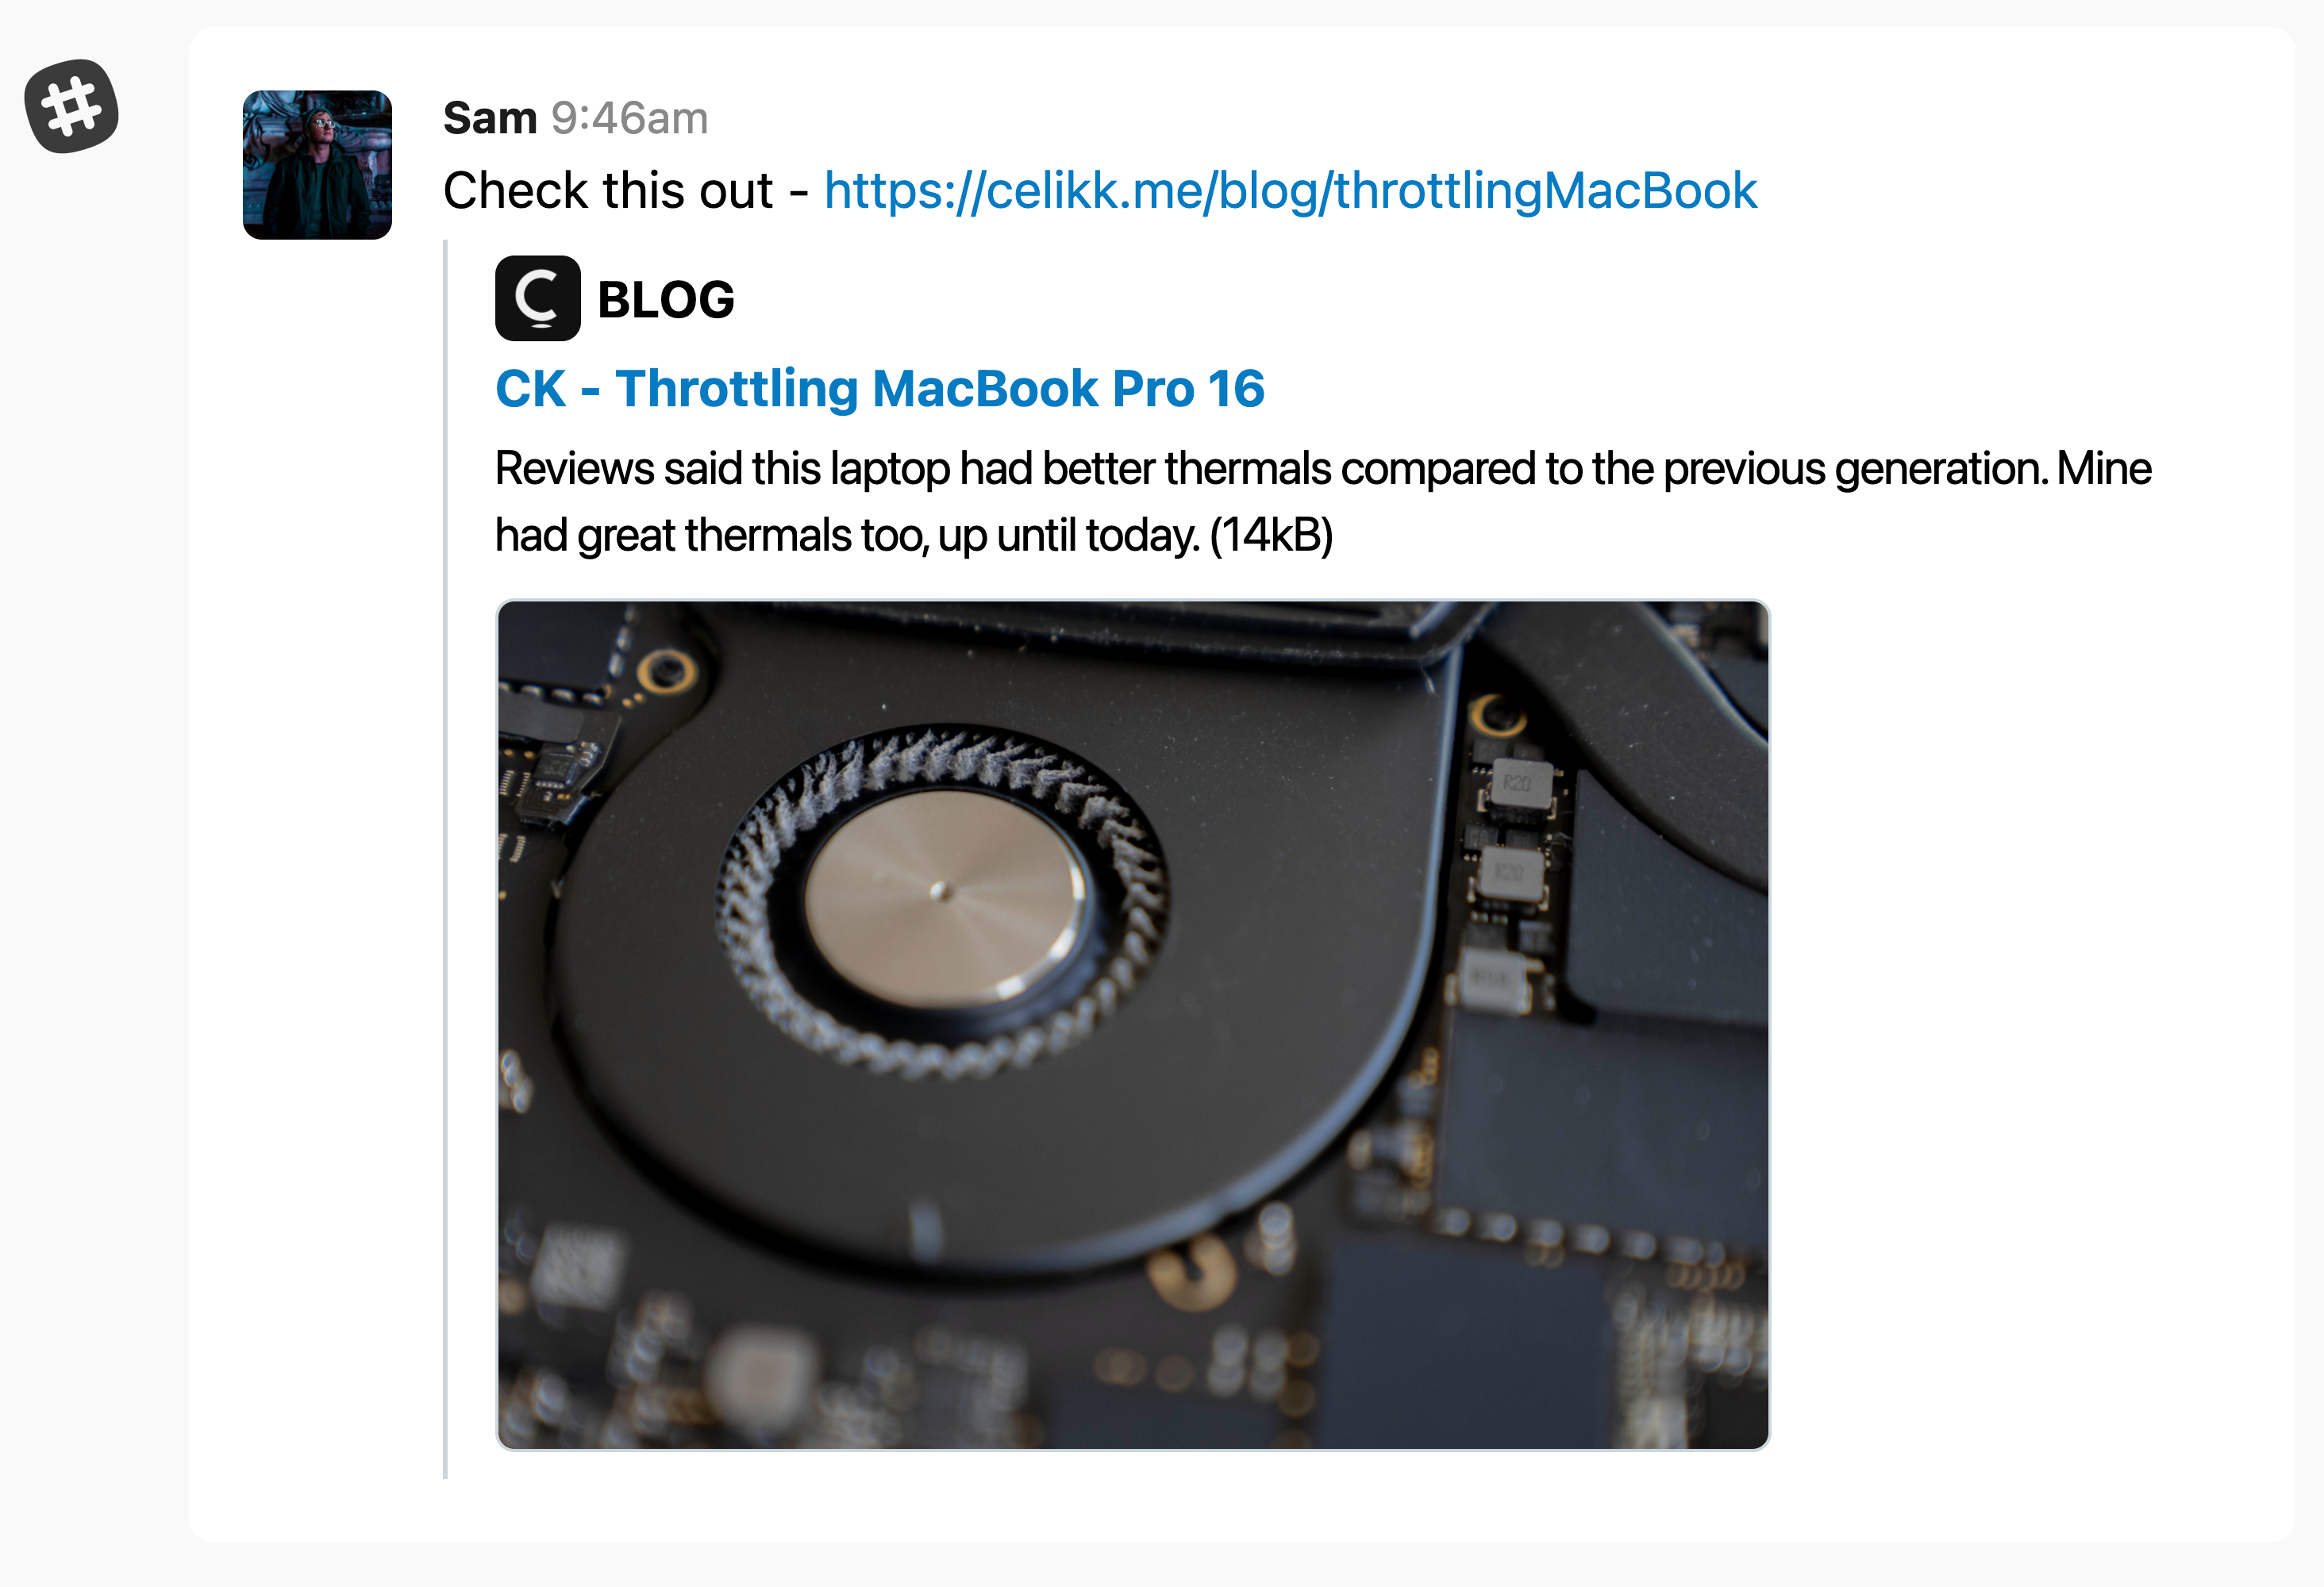
With BlogMetaDecorator, my blog posts can display cards when shared on social media. Here are some examples generated by metapreview.app:
BlogMetaDecorator is completely custom code that I wrote so I can provide meta information in the
same file as the blog post itself. This solution worked, and I was planning to use the same structure
in NextJS but I stumbled upon gray-matter when looking at the
NextJS blog starter project.
With gray-matter, I was able to achieve
the same thing and more in a more readable format compared to my BlogMetaDecorator. Here is what
the gray-matter version looks like:
---
title:
  page: "CK - Throttling MacBook Pro 16"
  post: "The Curious Case of a Throttling 16\" MacBook Pro"
description: "Reviews said this laptop had better thermals compared to the previous generation. Mine had great thermals too, up until today."
date: "2020-04-13"
readTime: "5 min"
cover:
  image: "/images/blogPost/throttlingMacBook/leftFanBottomRight.jpg"
  alt: "MacBook Pro 16 Left Fan with some dust"
author:
  name: Celik Koseoglu
  picture: "/images/blog/PP.jpg"
---
Thanks to gray-matter, I don't have to maintain BlogMetaDecorator anymore. Even more code I can delete.
I'd also like to mention, Vercel has created a lot of other starter templates. Maybe these will give you some ideas with yout NextJS project.
4) Rendering the blog page
NextJS blog starter came with
sample code that allows you to retrieve blog titles and other metadata directly from a folder of
markdown files. The gray-matter library that I talked about in the previous section helps with
that. So with NextJS's dynamic API routes, I can
add a new blog post to my website by just adding a single markdown file.
Previously, I had a separate file called blog.json which stored a list of blog posts (with titles, subtitles, dates read times and the markdown file name). When I wanted to add a blog post, I had to edit the blog.json file and add the markdown file separately into this folder. With the new approach, I only add the markdown file under the _posts directory and automatic Vercel deployments take care of the rest. One less file to worry about, one less point of failure.
5) Dependencies, Cache Config and Overall Less Maintenance Requirement
For this one, I've asked 5 of my software engineer friends (3 java backend engineers, 1 react front-end engineer, 1 android engineer) to tell me if they can notice any difference between the CRA and NextJS versions of my website without using inspector tools. None of them were able to tell a difference.
This is the package.json for CRA and this is the package.json for NextJS at the time of writing this blog post. As you can see, the NextJS version is smaller (34 vs 57 lines). Overall less dependency management and the users can't tell a difference. Plus, NextJS comes with Internet Explorer polyfills out of the box. You don't need to configure anything manually.
Cache policy is managed by Vercel, so you don't have to store a Firebase cache policy file. No need
for react-snap because NextJS does static rendering by default. Internet Explorer polyfill comes
out of the box. All of these things combined means that you'll spend less time worrying about upgrading
or configuring dependencies.
6) Hosting
Hosting a NextJS website is very easy if you're using Vercel. You're probably going to say, Firebase is just as easy, but no. You just create a NextJS app, put it on GitHub and give Vercel the branch name. Every time you push to that branch, Vercel does a deployment. No more manual deployments! You can configure automatic deployments on Firebase too but again, that's a more complicated process. Vercel just does it out of the box while providing a friendly user interface.
7) Total download size
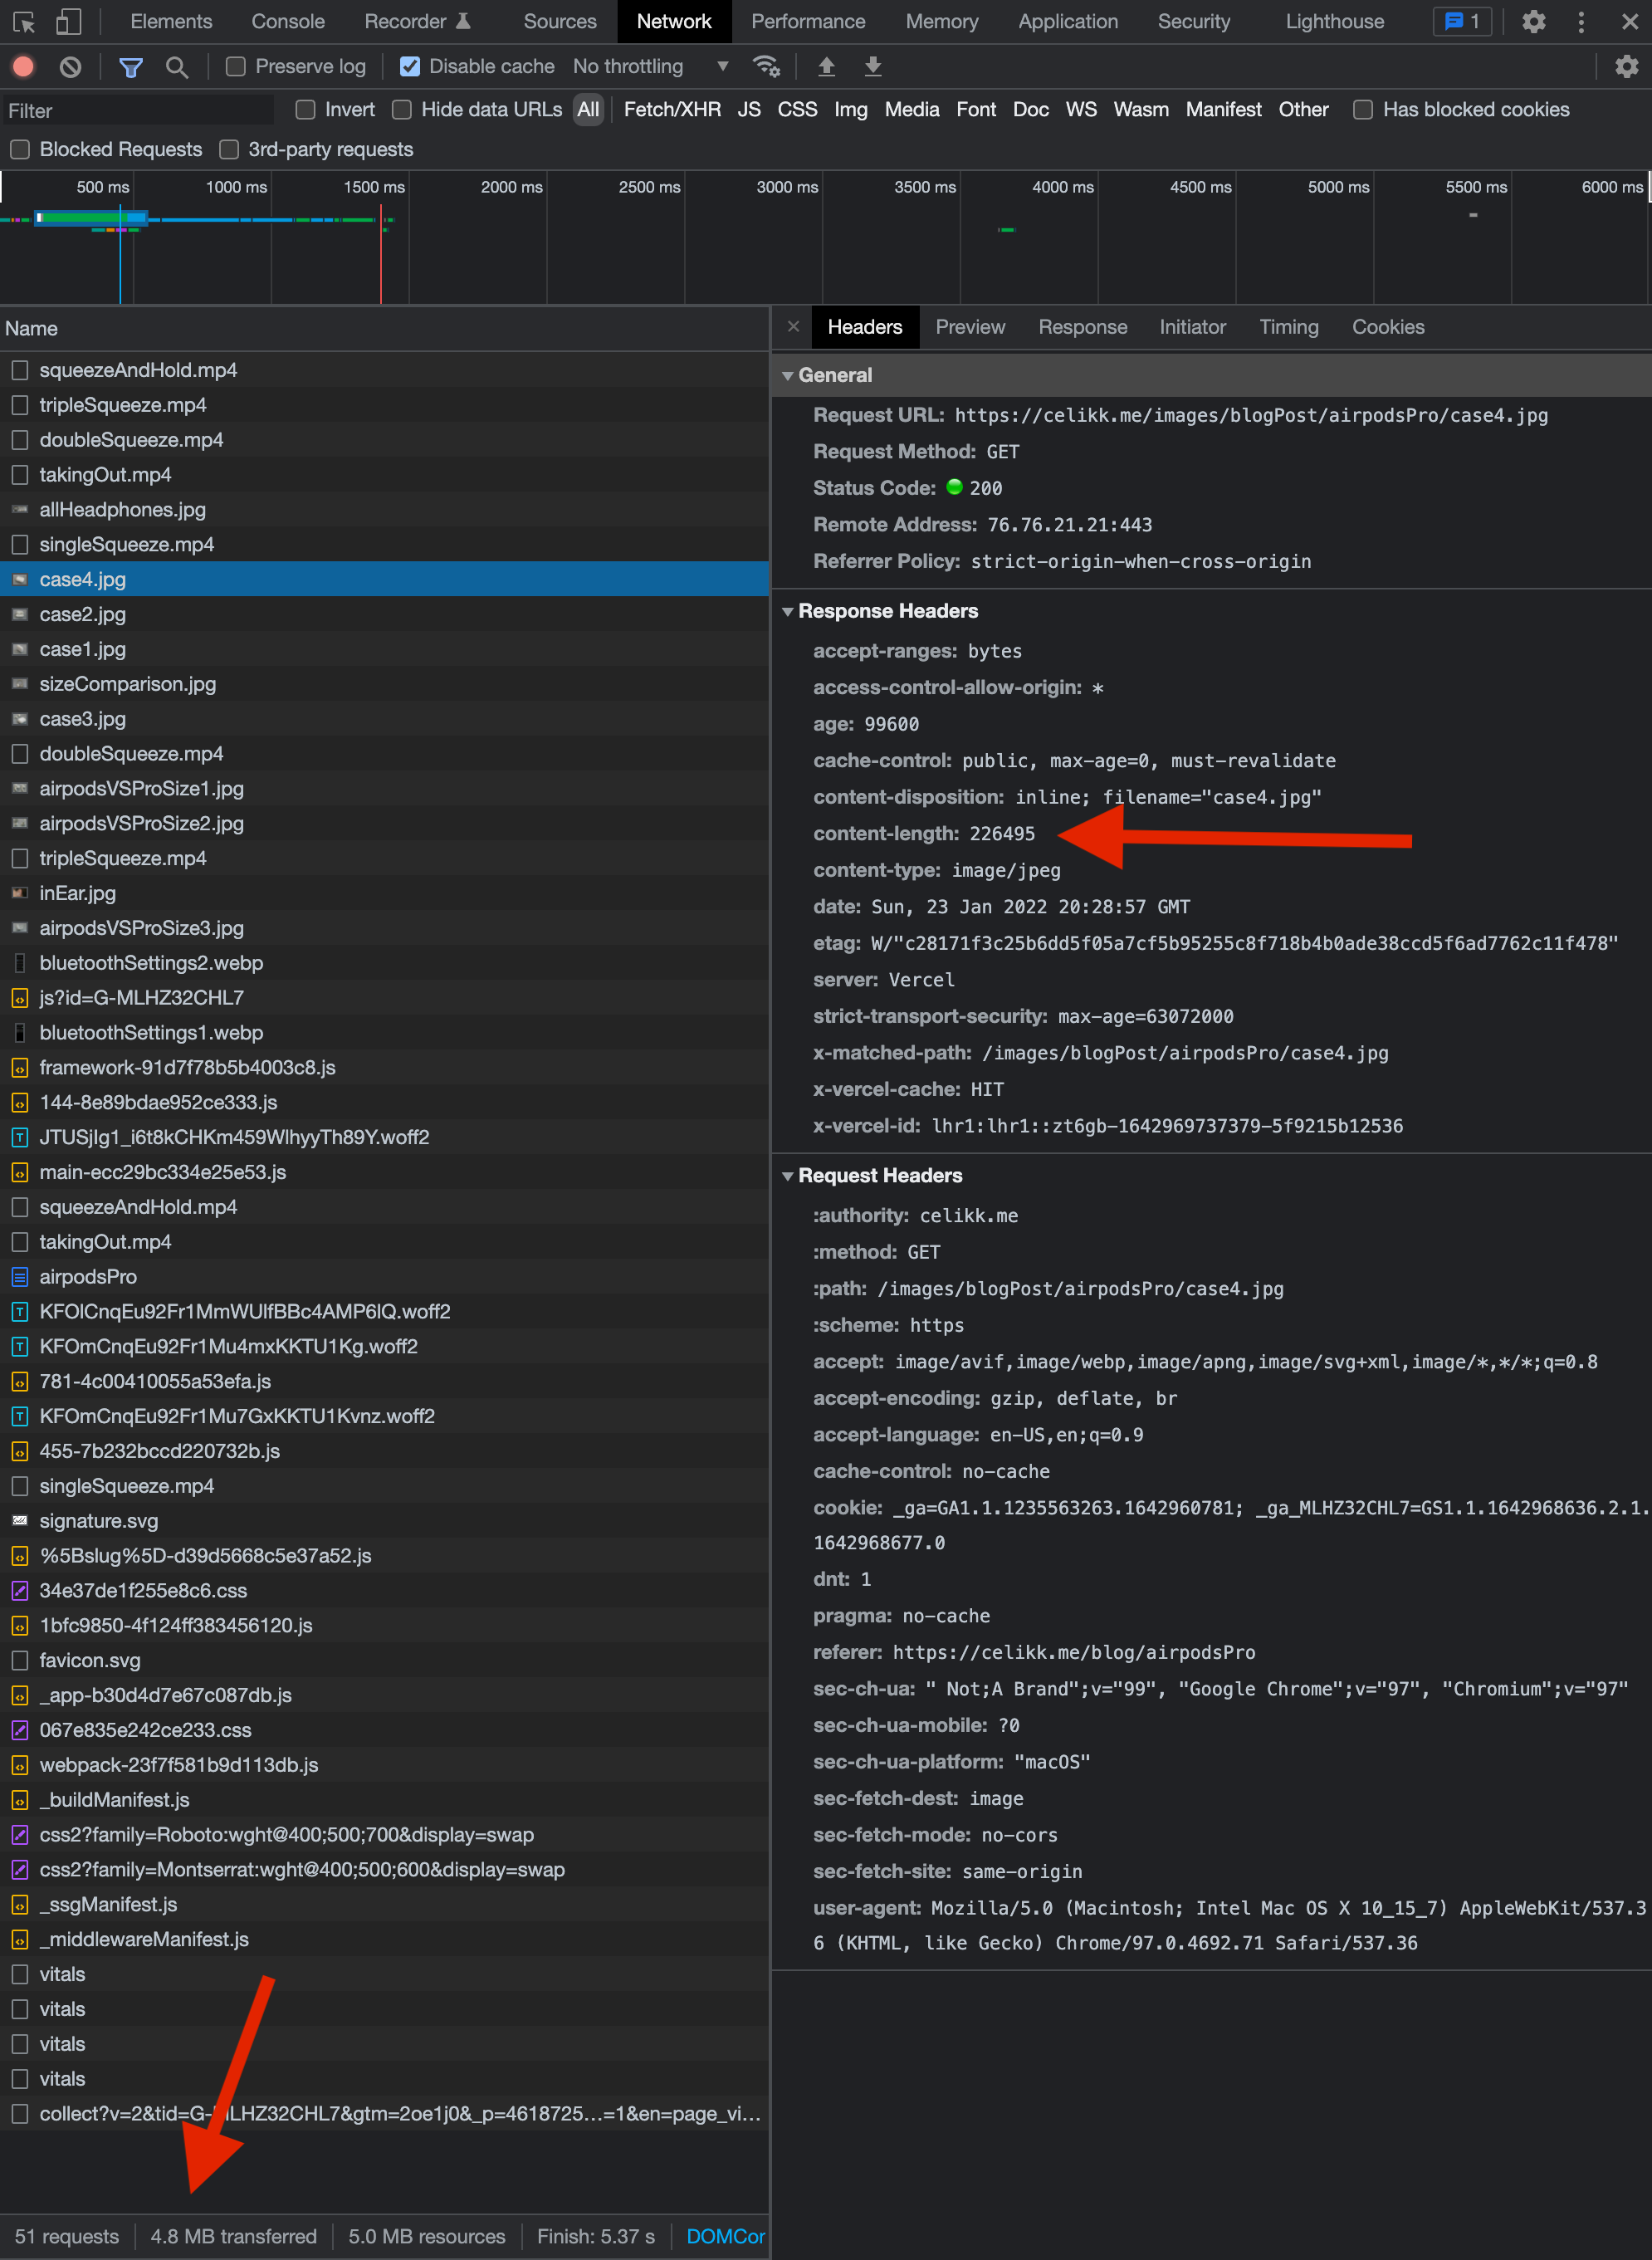
Vercel doesn't apply gzip (nor brotli) compressions on jpg, mp4 and many other MIME types (see supported
list here). This means,
if your site is heavy on images and if you're not using an external source for your images,
your website's total download size can increase significantly compared to Firebase.
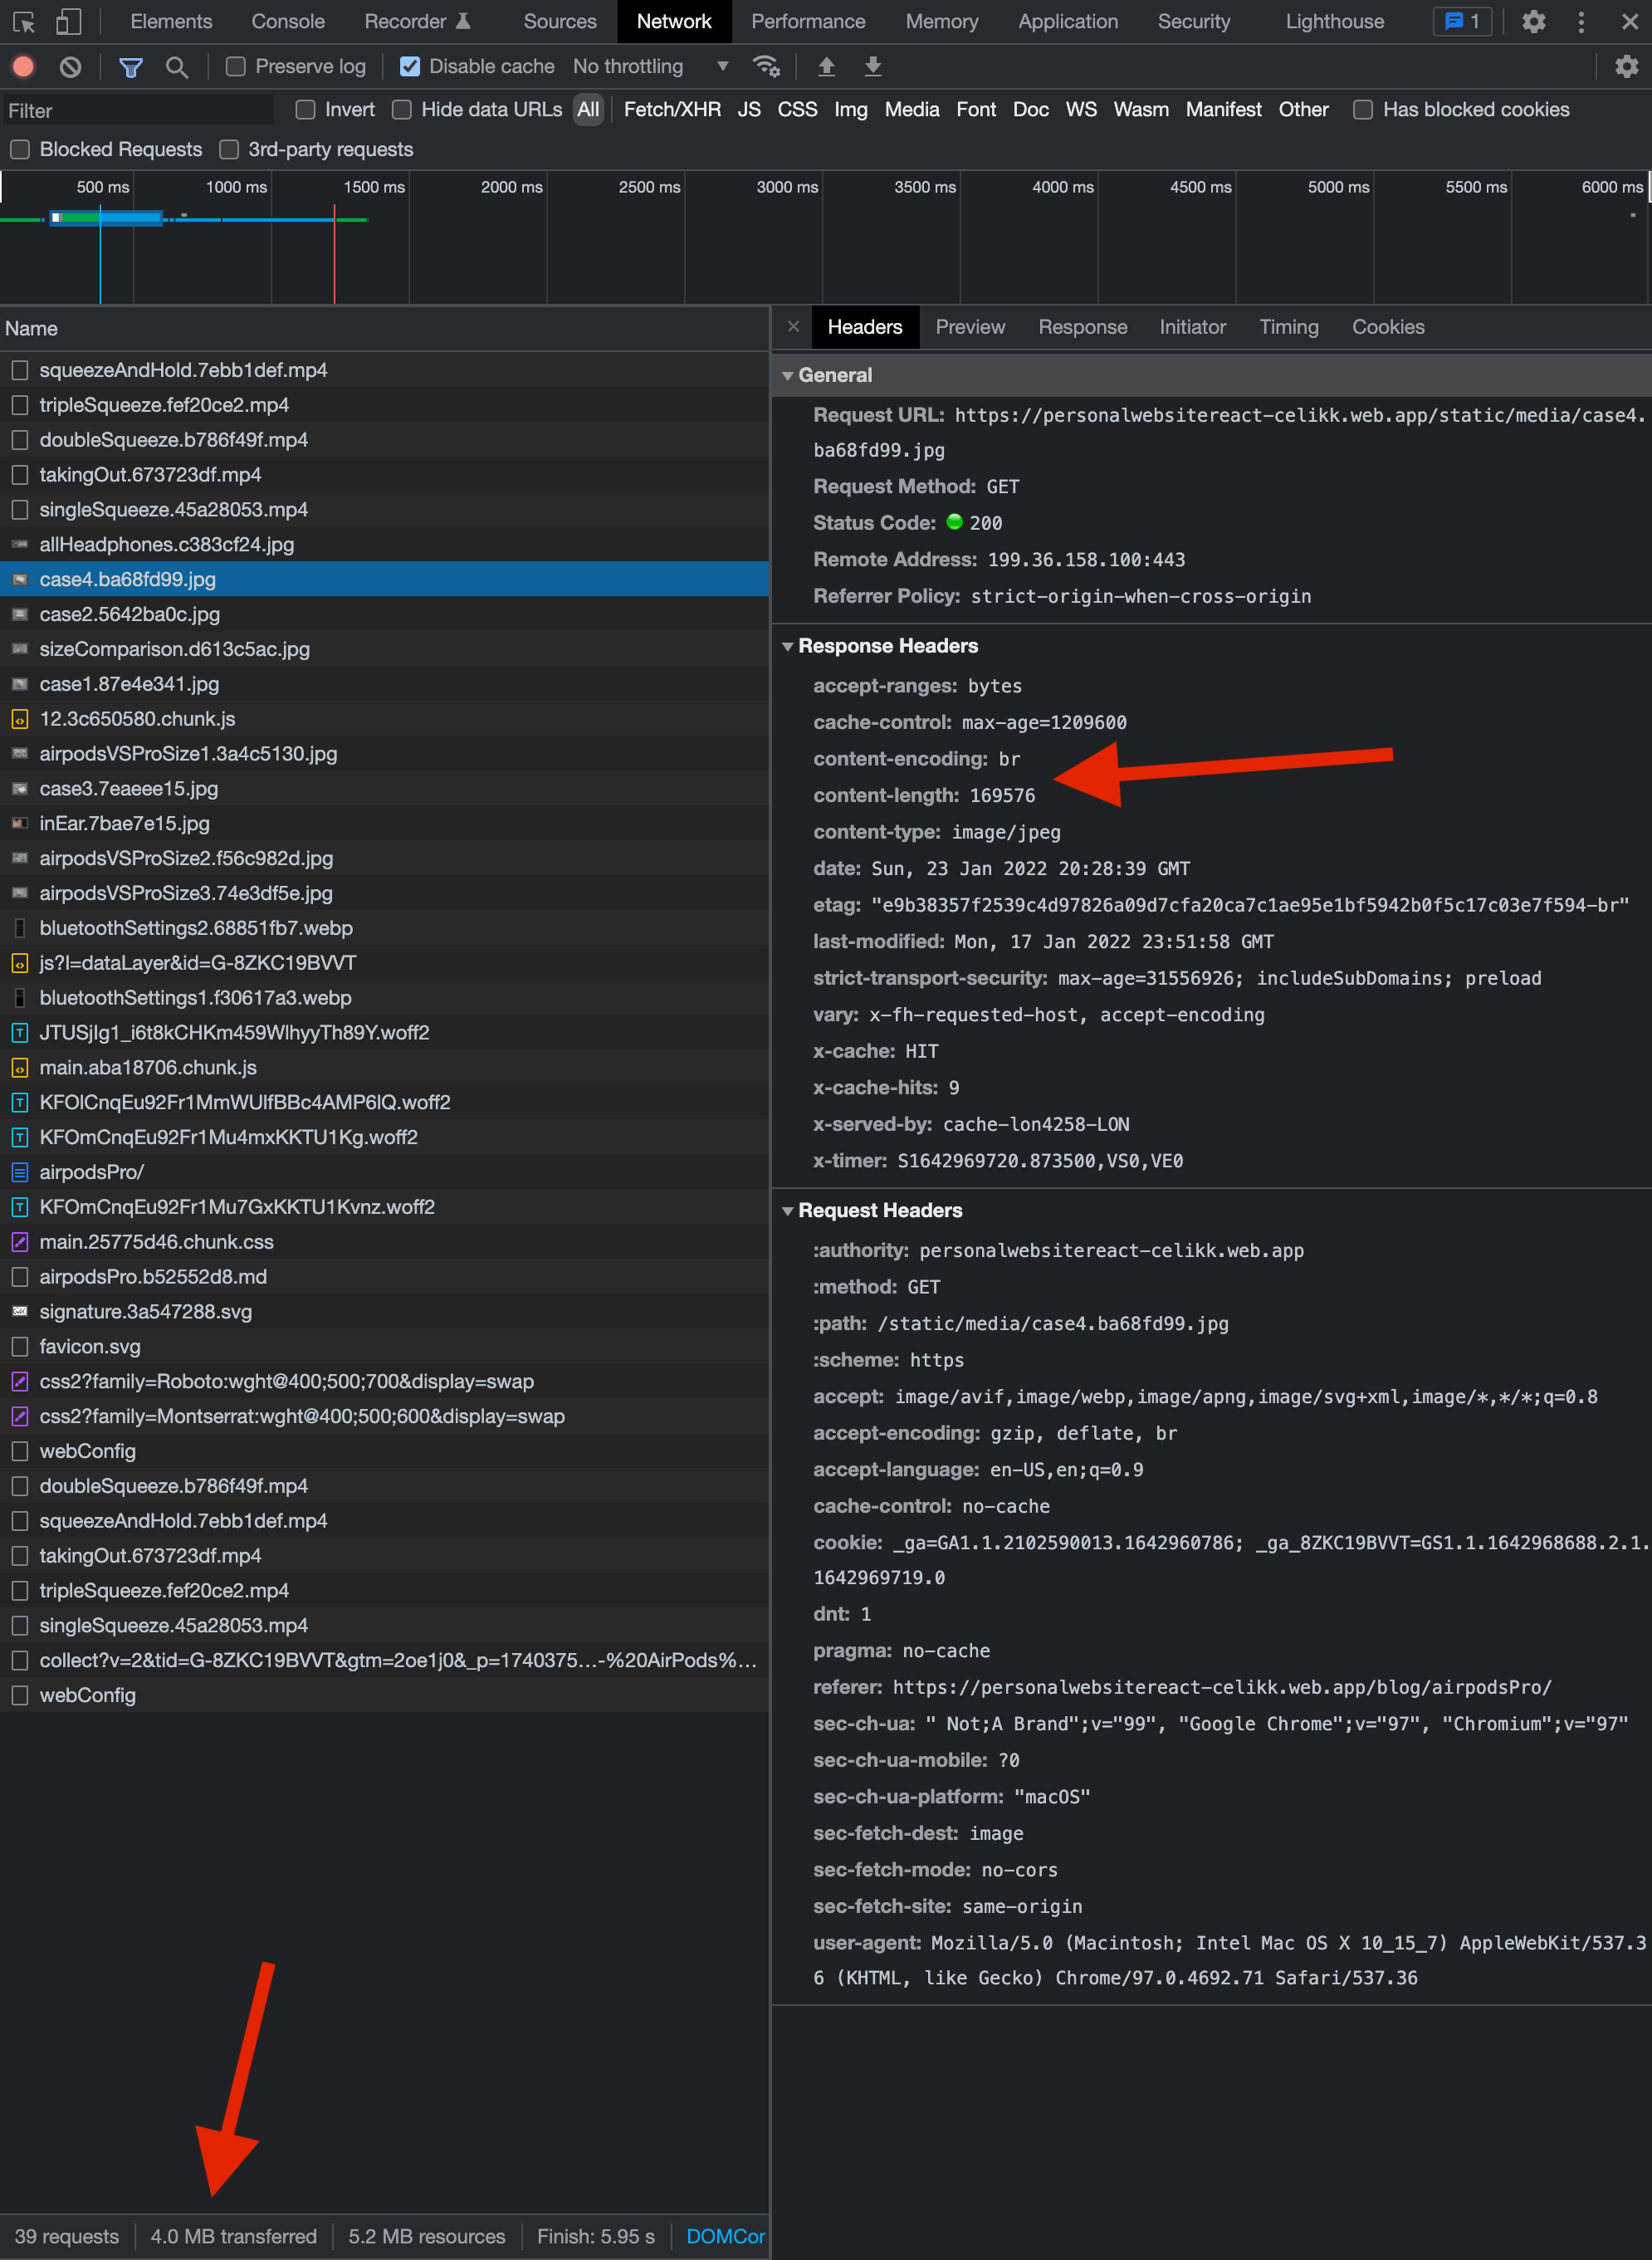
Here is a comparison between NextJS and CRA versions of my website, displaying the same content to users.
Notice on the last two images, the Vercel version doesn't have content-encoding under Response
Headers for jpg files. This makes the overall download size larger for Vercel hosting compared to Firebase:
However, NextJS provides an alternative called Next/Image which automatically optimises images and handles webp conversion. No need for manual webp generation anymore. While I haven't fully investigated the impact on the airpods pro blog post yet, my initial test shows this component basically gets the available viewport width, resizes the images on the server side, converts them into webp and serves them to the user that way. If you want to compromise on image quality and save bandwidth, this option is good for you. I'm going to explore this in the future. Maybe there is a lot more to it, I just haven't had the chance to explore it yet.
8) Performance
I haven't noticed a loading speed improvement on my home page or blog posts. The performance difference in my use-case between CRA and NextJS are imperceptible to the human eye. I tried using Lighthouse but everytime I ran the tests, the results were within the margin of error except the Cumulative Layout Shift result in blog posts.
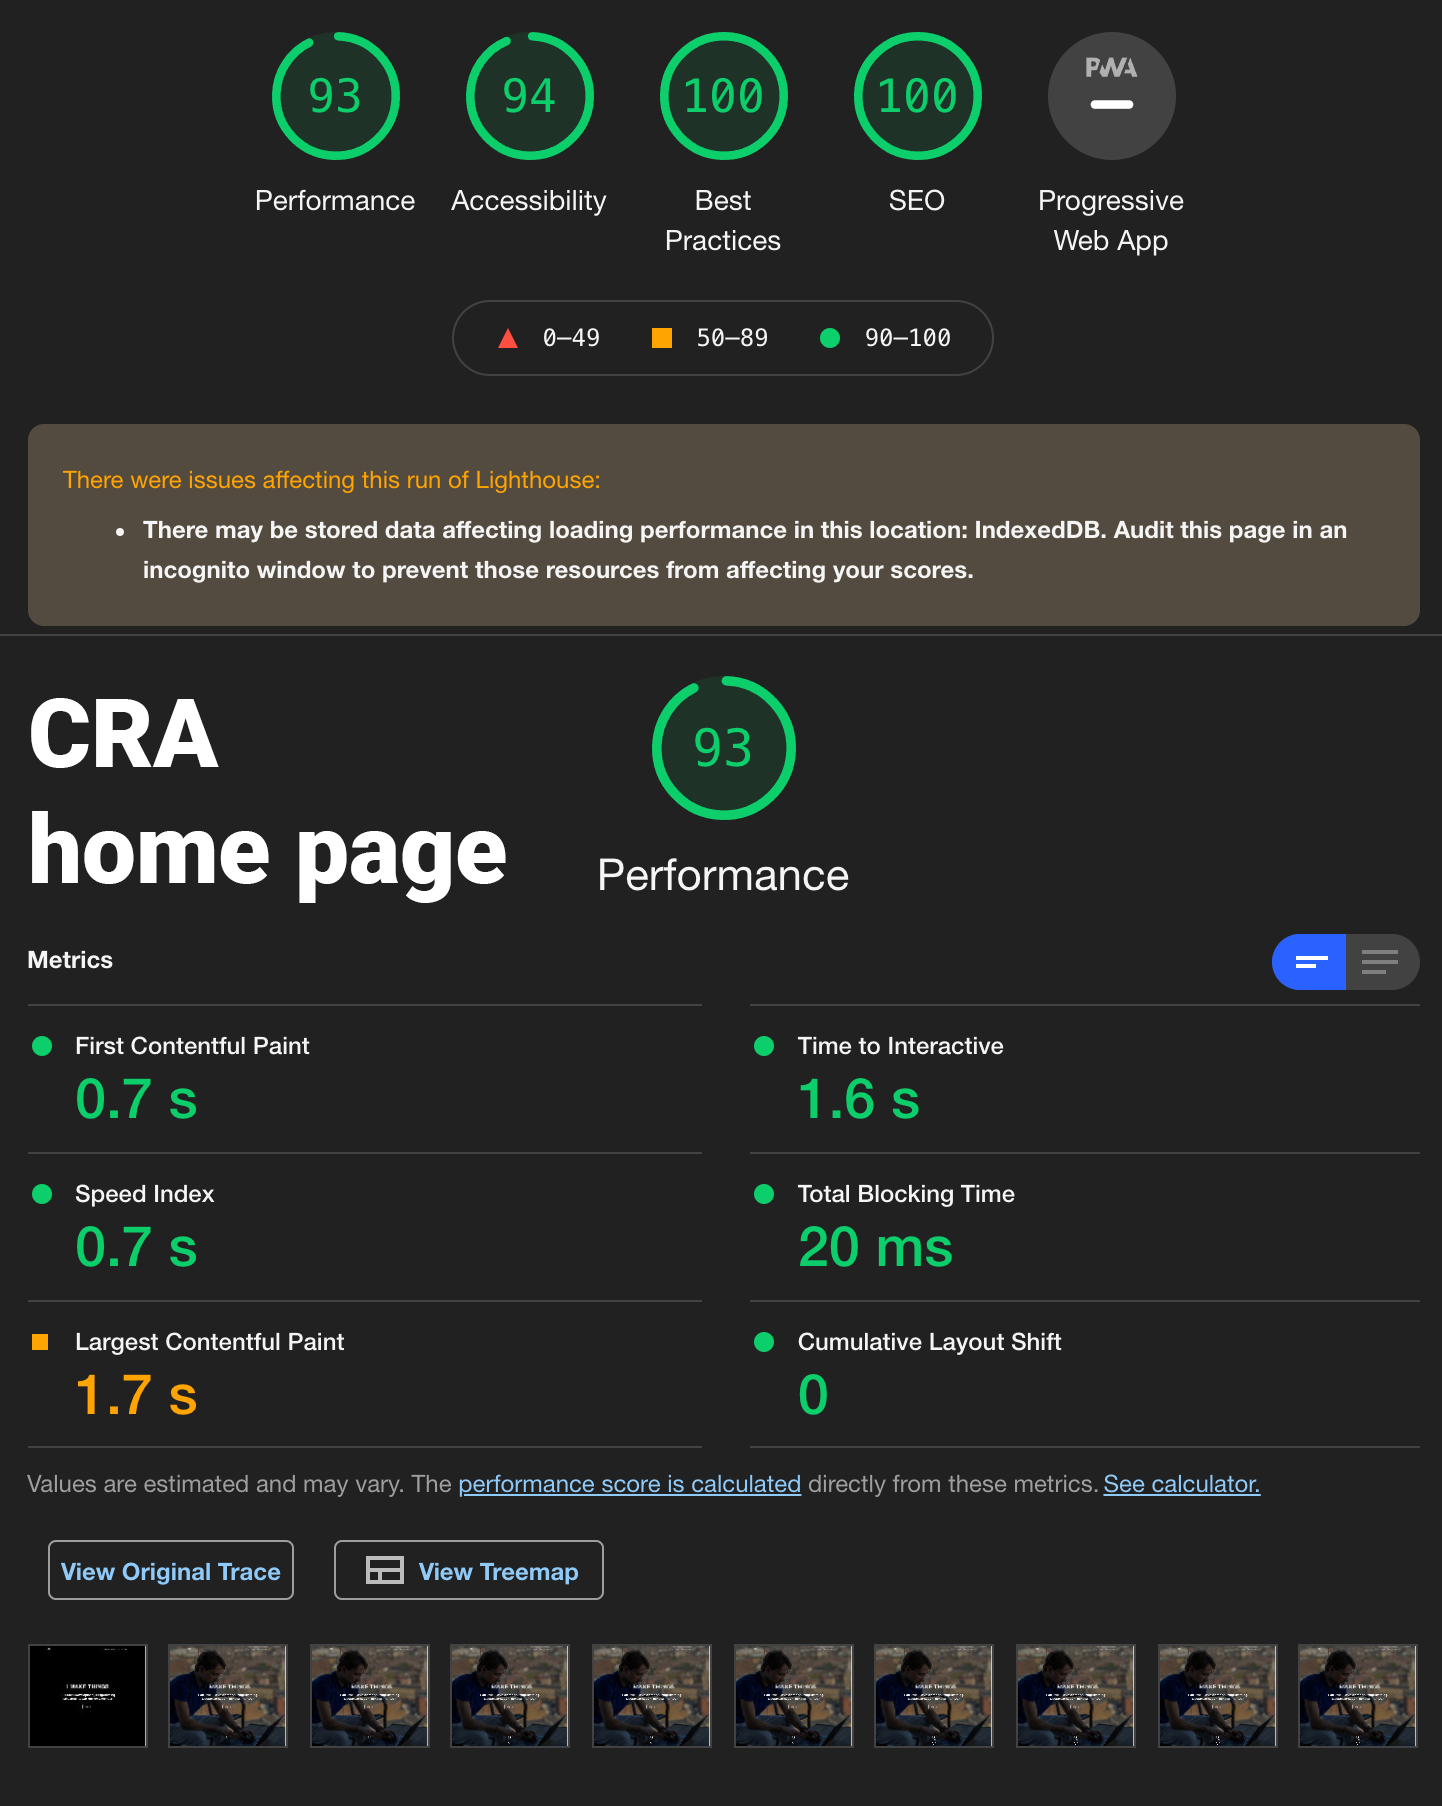
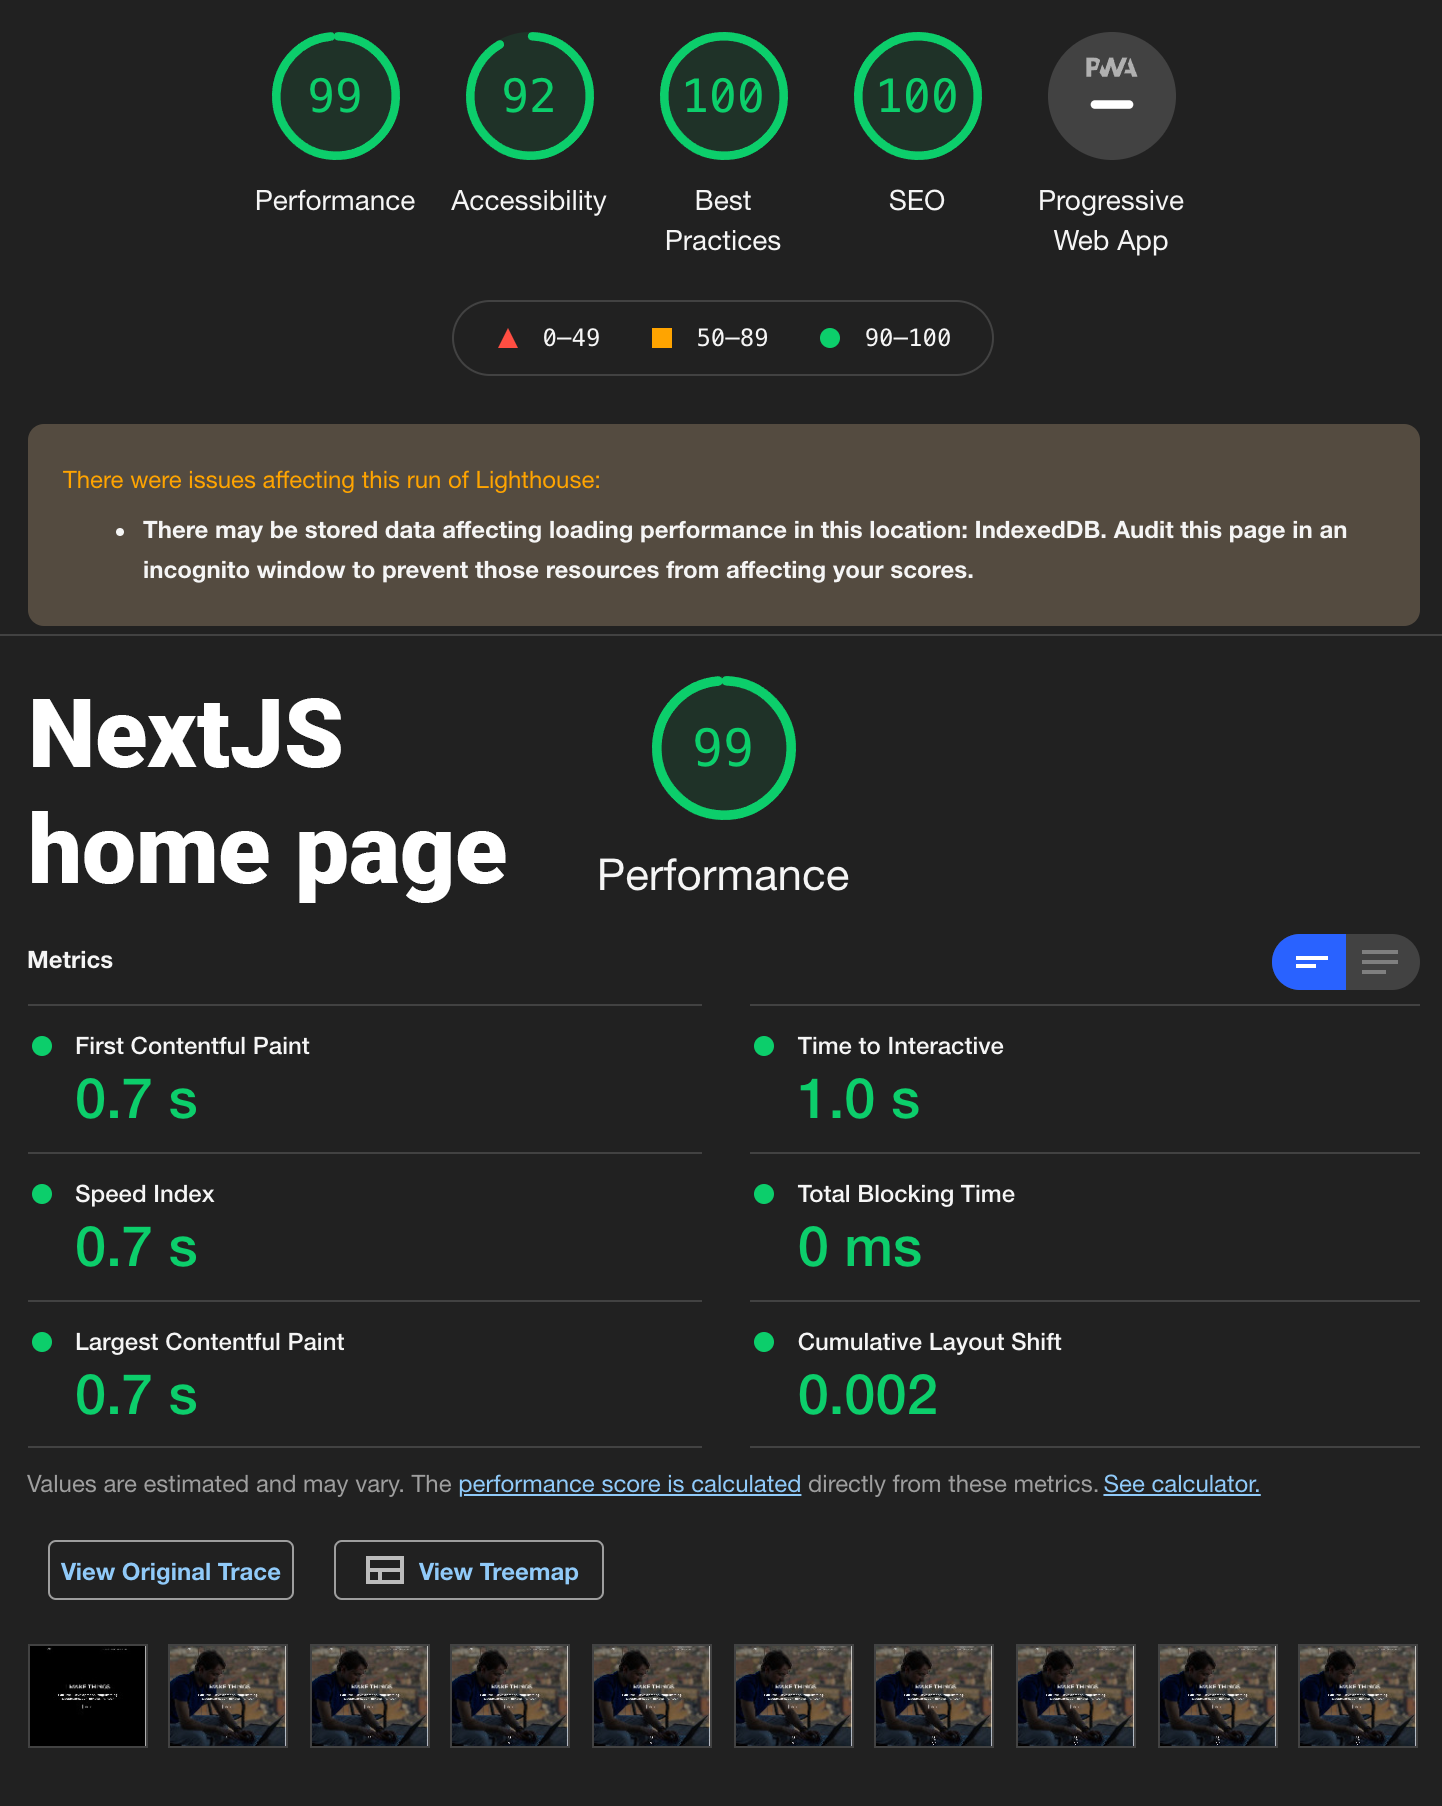
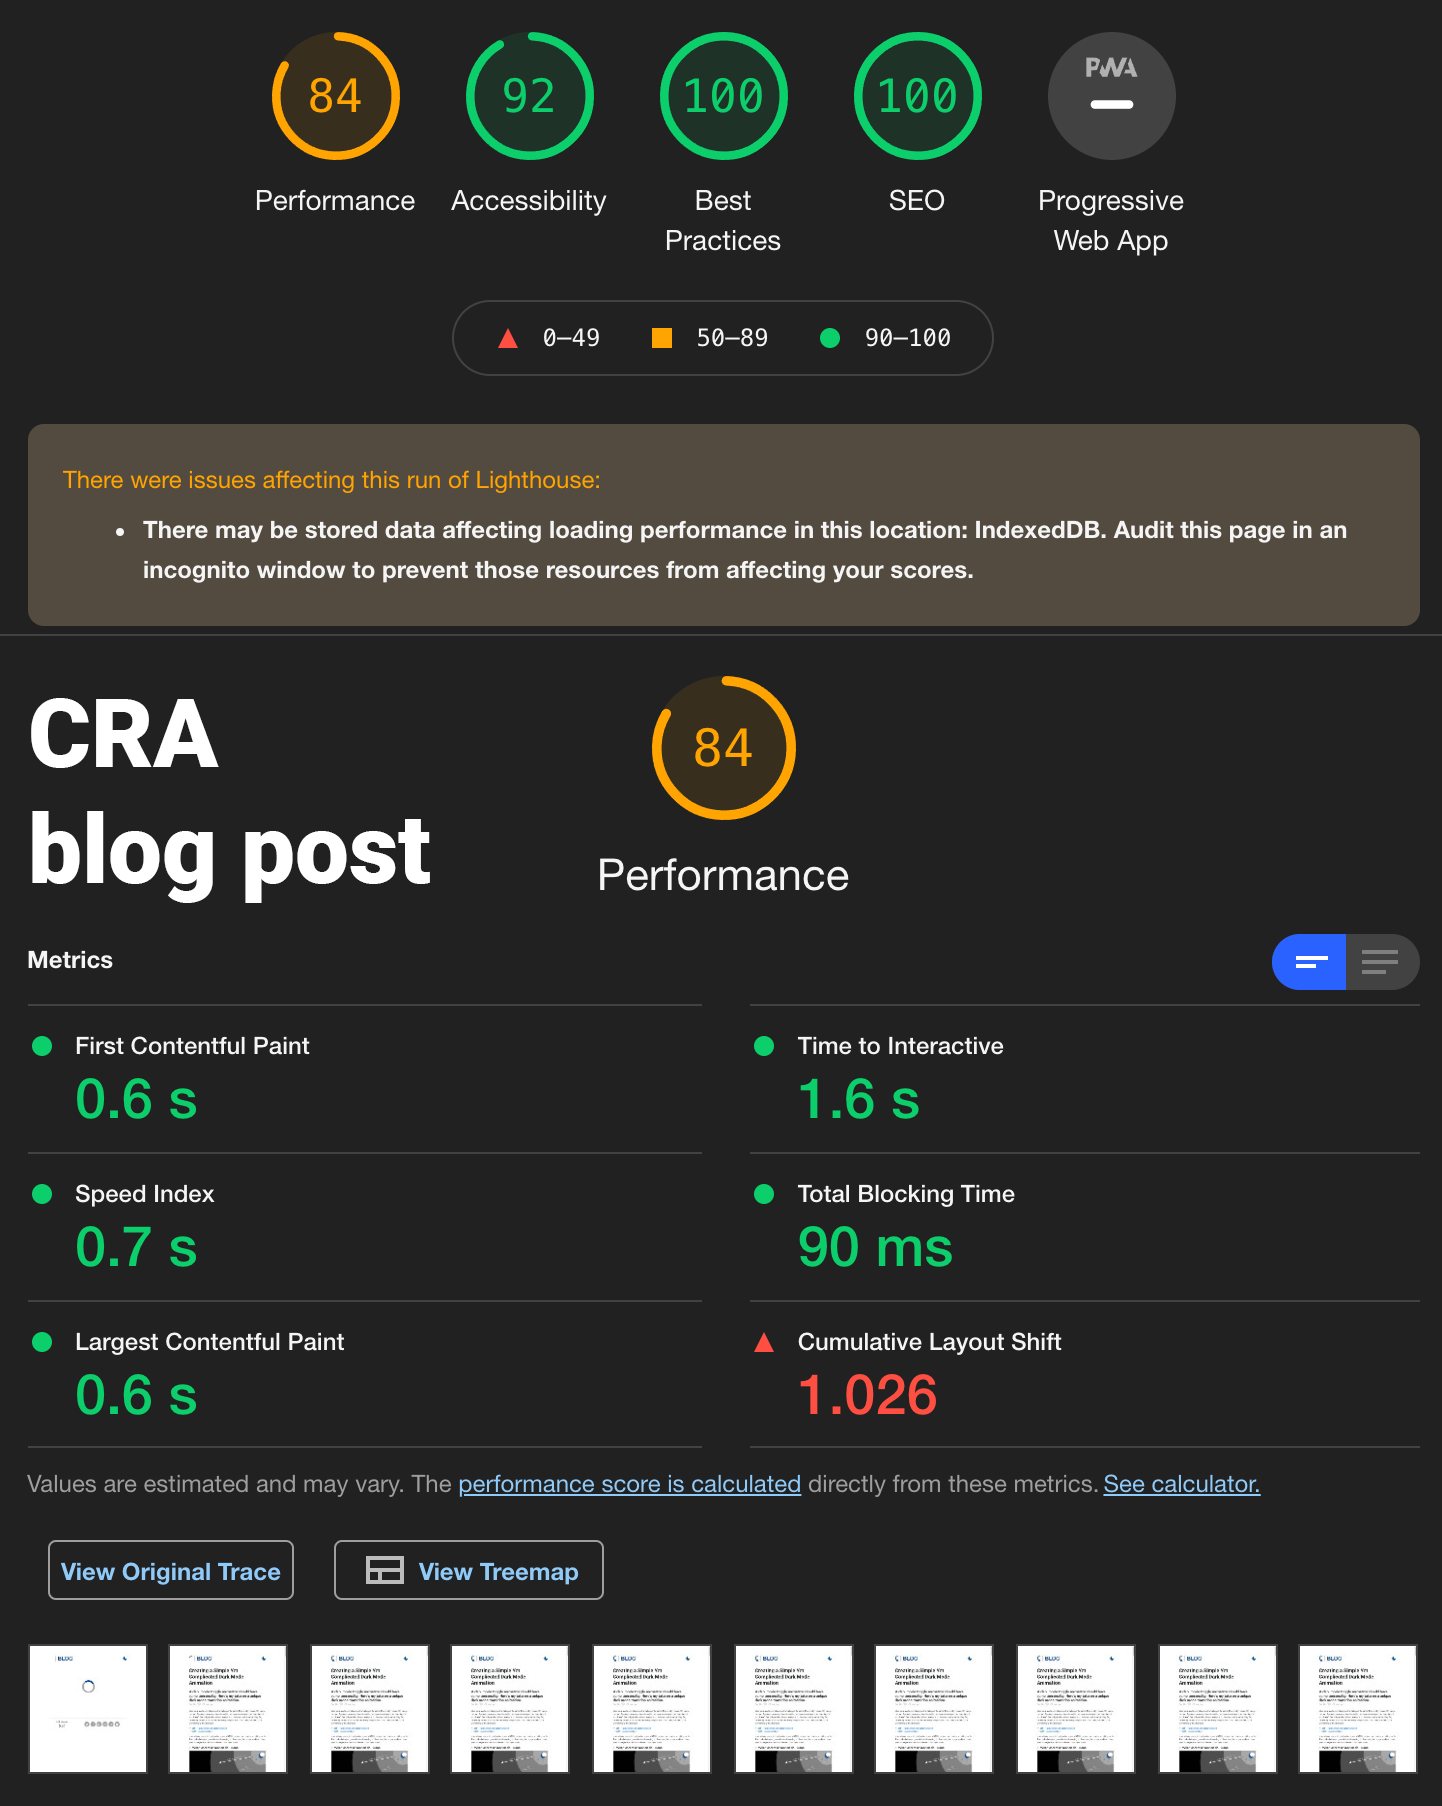
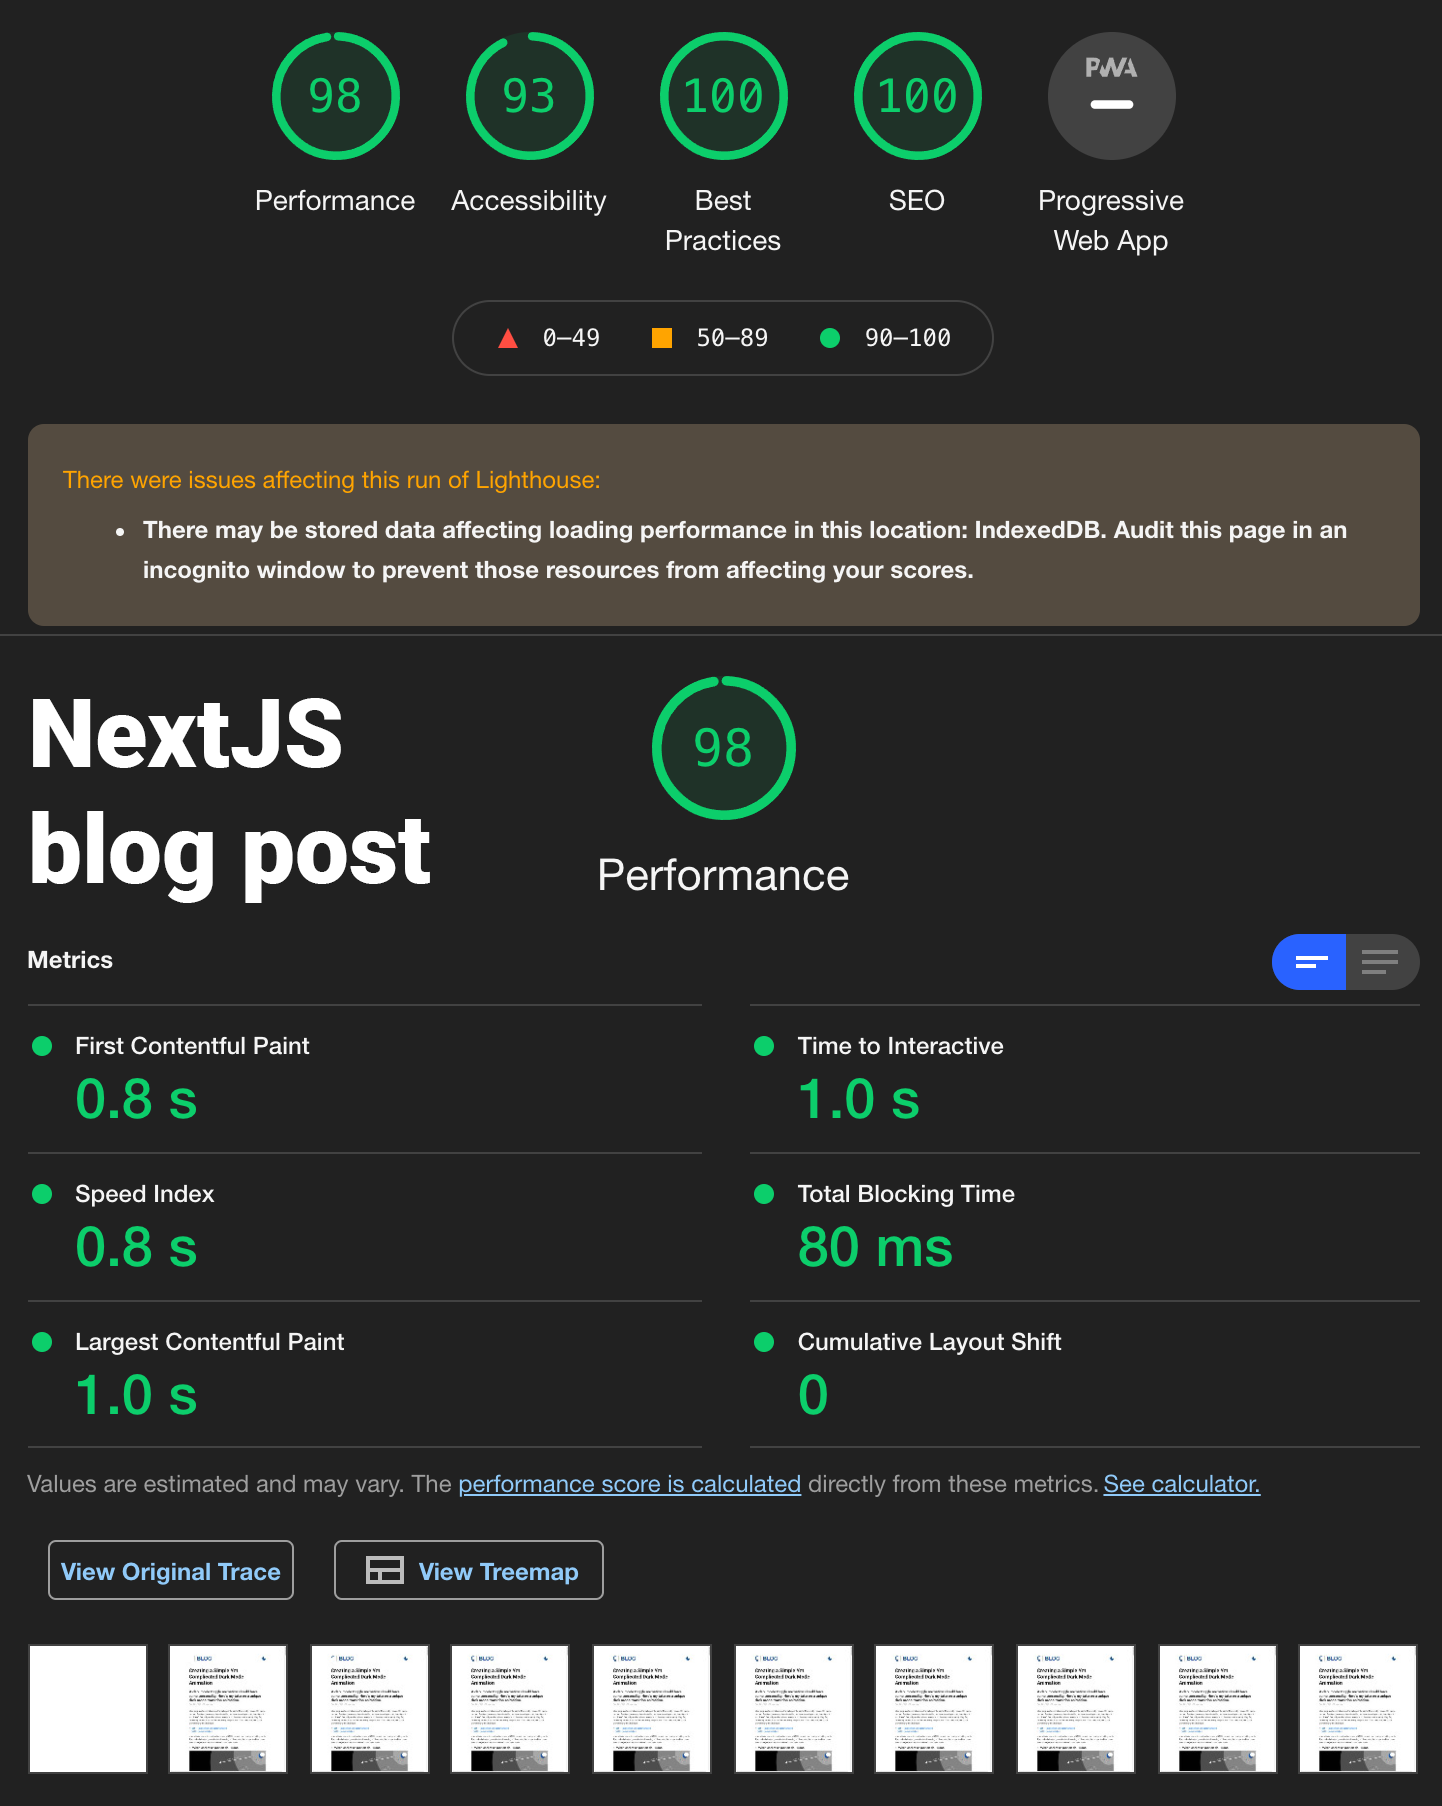
These results seem to be a fair comparison because in both cases, I'm hosting the production build
of my website. On one side, I have the CRA production build running using firebase serve, on the other side, I
have the NextJS production build running using yarn build && yarn start. To make sure these results are
also reflected in the real world, I've also run the same test on hosted websites. On one side,
I had my CRA website hosted on Firebase, one the other side NextJS hosted on Vercel. Results did not change.
9) What's next?
NextJS comes with several other handy tools. I haven't discovered all of them yet but the next thing for me is to use the Next/Image component. As I've explained in section 7, my initial investigation yielded positive results.
Long story short, I'm sure I'll discover a lot of benefits of NextJS as I progress with this project. I'm planning to make several new YouTube videos about NextJS and together with that, improvements to this website. There is a new UI framework every 3-4 years though. Whatever replaces NextJS, I'll learn and see what I can do with it!
Keep curious and keep learning.
Eventually your experience might turn into a blog post.